
Category: Interior Design

Room planning, materials, lighting and comfortable interior spaces.

  • Bedroom Layout Planning: A Practical Guide to Bed, Storage and Lighting

    Bedroom Layout Planning: A Practical Guide to Bed, Storage and Lighting

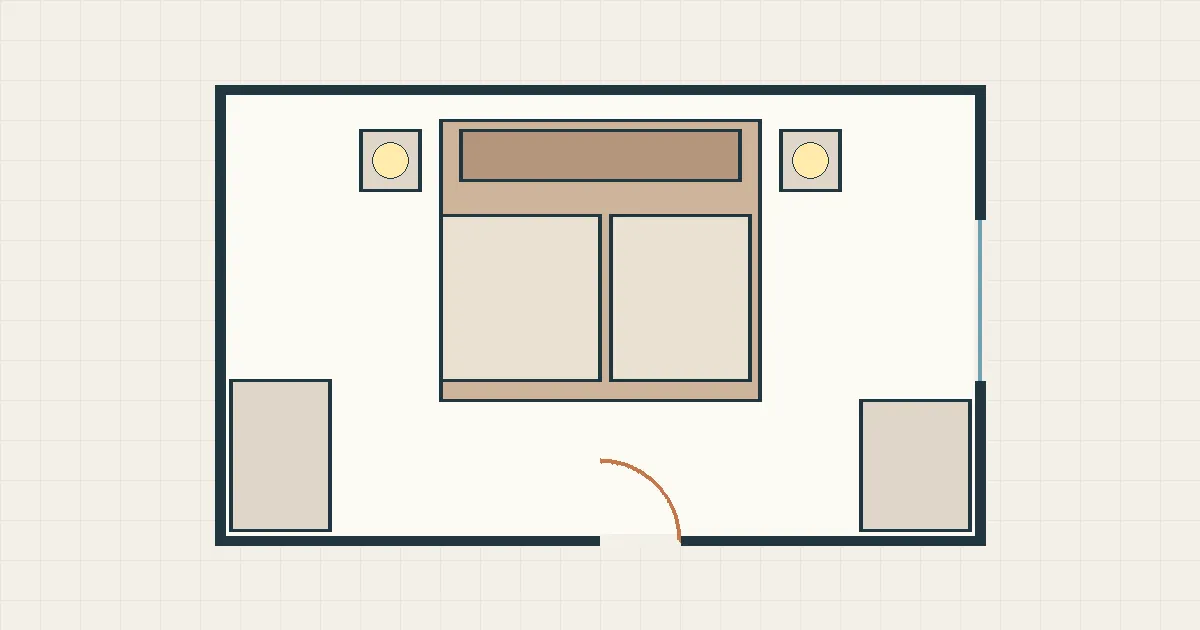
    A comfortable bedroom layout should make everyday routines feel simple. You need enough space to move around the bed, reach storage, open doors and use the room’s lighting without awkward workarounds. Before buying furniture or choosing a colour scheme, measure the room and test a few layout options on paper or in a 2D home design tool.

    Measure the room and mark fixed features

    Record the length and width of every wall, ceiling height, window and door locations, door swings, wardrobes, columns, radiators and other fixed features. Note where electrical outlets and light switches are placed. In an existing home, double-check measurements near alcoves or angled walls instead of assuming that the room is a perfect rectangle.

    Position the bed first

    The bed usually occupies the largest amount of floor area, so use it as the starting point. Test whether the headboard can sit against a solid wall and whether there is a natural route from the door to the bed and wardrobe. Check the actual bed-frame dimensions, including headboard depth and any drawers that need to open. A layout that only fits the mattress size may not fit the complete furniture piece.

    Plan bedside access and circulation

    Think about how both sides of the bed will be used. Where two people share a bed, check the access each person needs. Avoid placing a bedside table where it blocks a doorway, wardrobe or window. Keep the main walking route clear and check how the room feels when drawers and doors are open.

    Make storage part of the floor plan

    Wardrobes, dressers and shelves should be planned before small décor items. Measure the depth of storage units and allow for their doors or drawers to open. Use vertical space when appropriate, but keep frequently used items easy to reach. Built-in storage may help an awkward room, although its dimensions and installation should be checked carefully.

    Layer bedroom lighting

    Use general lighting for moving around, bedside or reading lights for focused tasks, and softer lighting for a calm atmosphere. Consider switch locations so lights can be controlled conveniently. Check whether lamps or wall fixtures will be blocked by the headboard, curtains or tall furniture.

    Choose colours and materials after the layout

    A restrained palette can help a bedroom feel settled, but durability and cleaning matter too. Consider flooring comfort, washable wall finishes and window coverings that suit privacy and daylight needs. View samples in the actual room because colours can look different under natural and artificial light.

    Test the plan in 2D and 3D

    Use a 2D floor plan to check dimensions and furniture clearances. A 3D view can help you judge the height of wardrobes, the visual weight of a headboard and the relationship between furniture and windows. Keep the model focused on the room’s real dimensions, then verify critical measurements in person.

    Bedroom planning checklist

    • Room dimensions and door/window positions are recorded.
    • The bed and largest storage pieces fit at their real dimensions.
    • Wardrobe doors and drawers can open without conflict.
    • Walking routes remain usable.
    • Bedside lighting and outlets suit daily routines.
    • Finishes are suitable for cleaning, comfort and maintenance.

    Explore our room-by-room design guide and broader interior design resources for more planning ideas.

    Final checks before you move furniture

    Test the plan with painter’s tape on the floor: mark the bed, wardrobe door swing and bedside tables, then walk the room. Keep at least 60 to 75 cm beside the bed on any side you will use, and make sure wardrobe or drawer fronts can open without hitting the bed. Position the bed so you are not directly in line with a door if you prefer a calmer feel, and avoid placing it where a window draught or radiator will be uncomfortable.

    Use warm, dimmable lighting at bedside and separate switches for the main light, so you can control both from bed.
    Further reading

  • Kitchen Layout Planning: A Practical Checklist Before You Remodel

    Kitchen Layout Planning: A Practical Checklist Before You Remodel

    A successful kitchen layout makes everyday tasks feel more natural. Before choosing cabinet colours or appliances, map the room, identify fixed services and decide where food storage, preparation, cooking and cleanup should happen. This helps you compare layouts based on how the kitchen will be used.

    Record the room and its constraints

    Measure the walls, ceiling height, doors, windows and any columns or bulkheads. Mark plumbing, electrical points, ventilation routes and existing appliance locations. Note which elements can realistically move and which may add significant cost or require professional work.

    Organize the main work zones

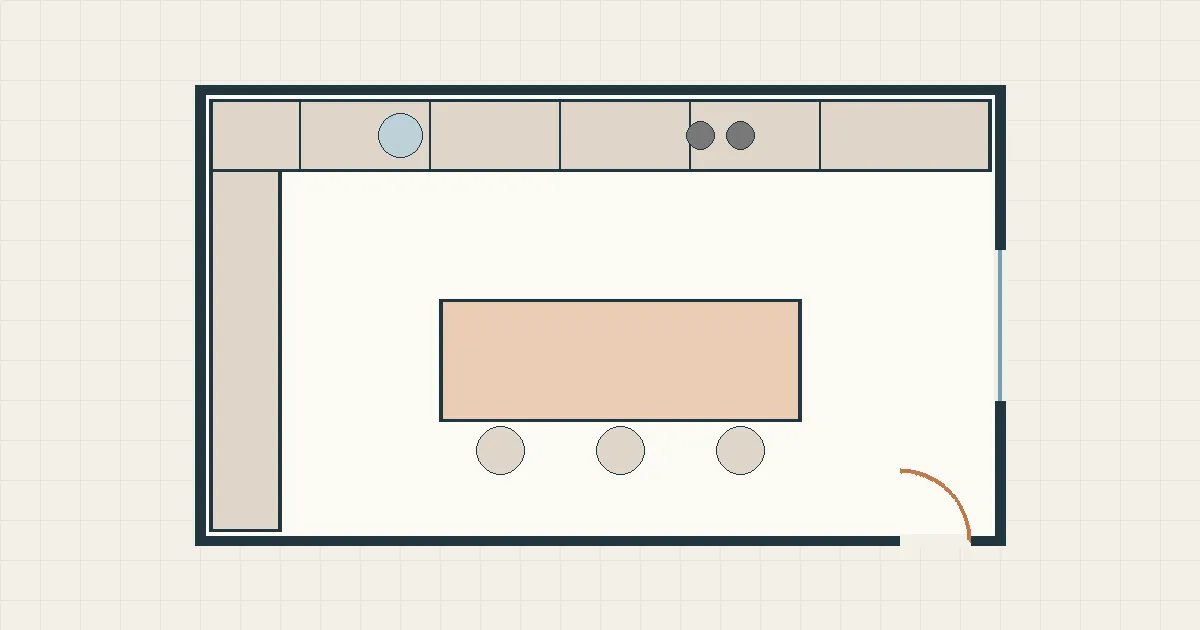
    Think through the sequence of taking food from storage, preparing it, cooking and cleaning up. Keep commonly used items close to where they are needed. A kitchen can use a galley, L-shape, U-shape or island arrangement, but the best option depends on the room dimensions, openings and household routines.

    Check appliances and clearances

    Use the dimensions and installation guides for the exact appliances you are considering. Allow for door openings, ventilation requirements and access for maintenance. Do not rely on generic drawings when the manufacturer’s instructions specify a particular clearance or connection.

    Plan storage around real habits

    Group cookware, dishes, pantry goods, cleaning products and small appliances according to where they are used. Include accessible storage for everyday items and consider how cabinet doors and drawers interact with nearby appliances and walkways.

    Layer the lighting

    Provide general light for the room and task lighting for preparation and cooking surfaces. Consider under-cabinet lighting where it suits the design. Check how window daylight changes during the day and whether reflective surfaces create glare.

    Test the layout in 2D and 3D

    Draw the measured plan and add the actual appliance and cabinet sizes. Then switch to a 3D view to review cabinet heights, sightlines, island proportions and the overall feel of the room. A visual model can help communicate the idea but does not verify building safety or technical installation.

    Before work begins

    Confirm electrical, gas, plumbing, ventilation, waterproofing and structural requirements with qualified professionals and local authorities. Keep product specifications and final measurements together so the people carrying out the work can check them.

    For related planning ideas, explore our kitchen and bathroom design guide and interior design resources.

    Clearances and workflow checks

    Kitchen planners commonly recommend roughly 105 to 120 cm of clearance between facing counters so two people can pass, and about 90 cm minimum for single-cook kitchens. Keep the sink, cooktop and refrigerator within an easy triangle without letting traffic cut through it. Allow landing space beside the cooktop and refrigerator, and make sure dishwasher and oven doors do not collide with each other or with walkways when open.

    Plan outlets, ventilation and task lighting at the layout stage, not after cabinets are ordered, since moving them later is expensive. Confirm appliance dimensions from the manufacturer specification sheet before finalising cabinet widths.

    Further reading

  • Small Living Room Layout Ideas That Make Space Work

    Small Living Room Layout Ideas That Make Space Work

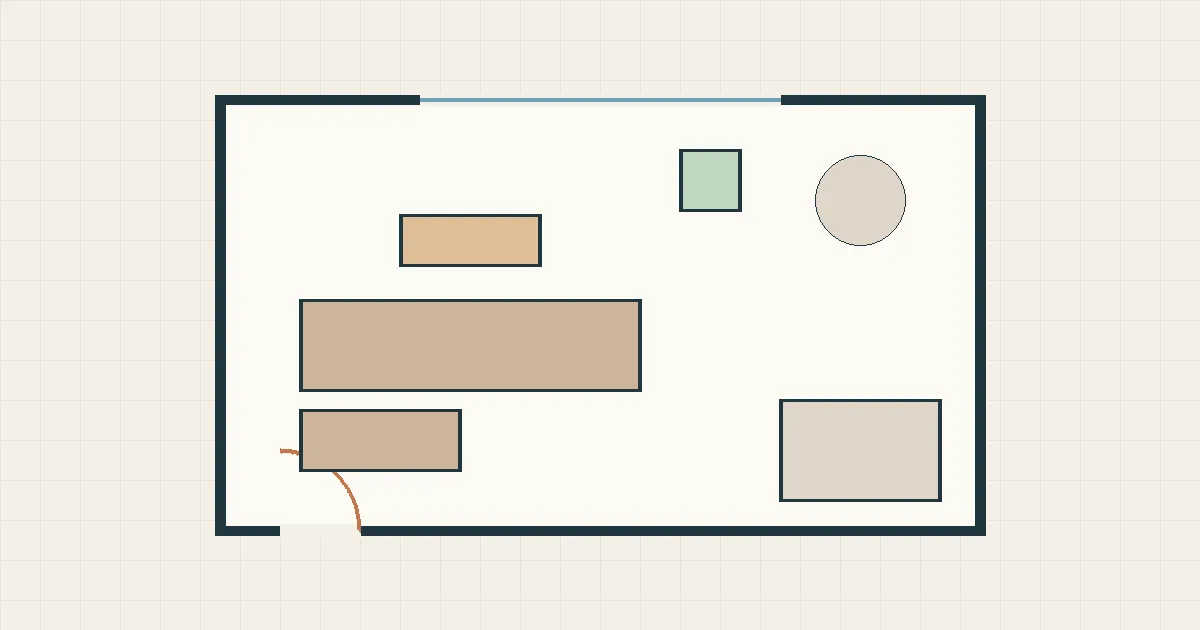
    A small living room does not need to feel crowded. The biggest improvement often comes from choosing a layout that respects how people move through the room. Before buying a new sofa or adding storage, draw the space and test the main furniture pieces at their actual sizes.

    Start with the room’s fixed points

    Measure the room and mark doors, windows, radiators, columns and built-in storage. Note where people enter and where they need to pass through. These details often determine which walls can support larger furniture and which areas need to stay open.

    Choose one clear focal point

    A living room may be organized around a window, television, fireplace, view or conversation area. Decide which feature should lead the arrangement. Trying to make every wall a focal point can create visual noise and make furniture placement harder.

    Use furniture that fits the footprint

    Measure sofas, chairs and tables before purchasing. A deep sofa can take up more usable area than its width suggests. Consider open-leg furniture, nesting tables or a compact side table when they suit the way the room is used. Do not choose pieces so small that they become uncomfortable simply to preserve empty floor area.

    Protect the walking routes

    Keep the main path between the entrance and the rest of the home easy to understand. Avoid placing a coffee table or chair where it blocks a door swing or creates a narrow pinch point. If the room serves several purposes, use rugs, lighting or furniture orientation to suggest zones without adding unnecessary partitions.

    Make storage do more than one job

    Consider a storage ottoman, a console with closed compartments or wall shelves where they do not interfere with seating or circulation. Keep frequently used items close and avoid filling every available wall with cabinets.

    Use light and colour thoughtfully

    Let daylight reach as much of the room as possible. Use window treatments that suit privacy and the amount of light you need. A consistent palette can help a small room feel calm, while a few contrasting accents add interest. Layer overhead, task and ambient lighting rather than relying on one bright fixture.

    Test the plan in 2D and 3D

    A simple floor plan helps confirm furniture dimensions and circulation. A 3D view can reveal whether a tall bookcase dominates the room or a sofa blocks the view from the doorway. Treat the model as a way to compare options, then verify the measurements in the actual room.

    Explore more interior design ideas and our room-by-room guide.

    Mistakes that make small living rooms feel smaller

    The most common error is pushing every piece of furniture against the walls. This leaves a hollow centre and rarely improves flow. Instead, float a compact sofa slightly off the wall and anchor the seating with a rug large enough for at least the front legs of every piece. Choose furniture with visible legs, which lets light and sight lines pass underneath, and prefer one multi-purpose item such as a storage ottoman over several small tables.

    Plan lighting in layers: one ambient source, one task lamp near seating and one accent. Keep a clear path of about 75 to 90 cm between the entry and the main seating area, and measure the television viewing distance before you buy a screen size.

    Further reading